

A properly installed sump pump protects your basement from flooding and costly water damage while giving you peace of mind during heavy rains. You can install a sump pump yourself or hire a pro, and this guide walks you through the essential steps, wiring and discharge basics, and maintenance tips to keep the system working when you need it most.
This post Sump Pump Installation breaks down pit preparation, pump selection, correct discharge routing, and simple testing so you know exactly what to do and why. You’ll also learn easy maintenance checks and backup options that ensure reliable performance over time.
Essential Steps for Sump Pump Installation
You will evaluate the space, set up a proper pit, place and secure the pump, and route discharge piping to a safe outlet. Each step requires specific tools and measurements to ensure reliable operation and avoid basement water problems.
Assessing the Basement and Location Selection
Start by identifying the lowest point of your basement; water will collect there and that spot makes the most effective pump location. Check for interior drain tile, foundation cracks, and nearby utilities; avoid placing the basin where it will interfere with structural footings or under load-bearing beams.
Measure clearance for the basin lid and access for future maintenance. Ensure a nearby grounded 120V outlet or plan for hardwiring to a GFCI-protected circuit. Confirm the chosen discharge route has a downhill grade and legal outlet away from the foundation; local codes often require discharge at least 10 feet from the house or into storm drain systems.
Preparing the Installation Site
Mark the basin diameter on the concrete floor and verify a minimum 6-inch clearance from walls and pipes. Use a hammer drill with masonry bits to score the outline, then break concrete with a jackhammer or rotary hammer until you reach stable soil below the slab.
Excavate a pit deep enough for the basin base plus 2–3 inches of gravel for leveling. Compact a 3–4 inch layer of coarse gravel to create a stable bedding and to aid drainage. Keep the work area dry and clear; have a wet/dry vacuum and shop lights ready for a safe, clean installation.
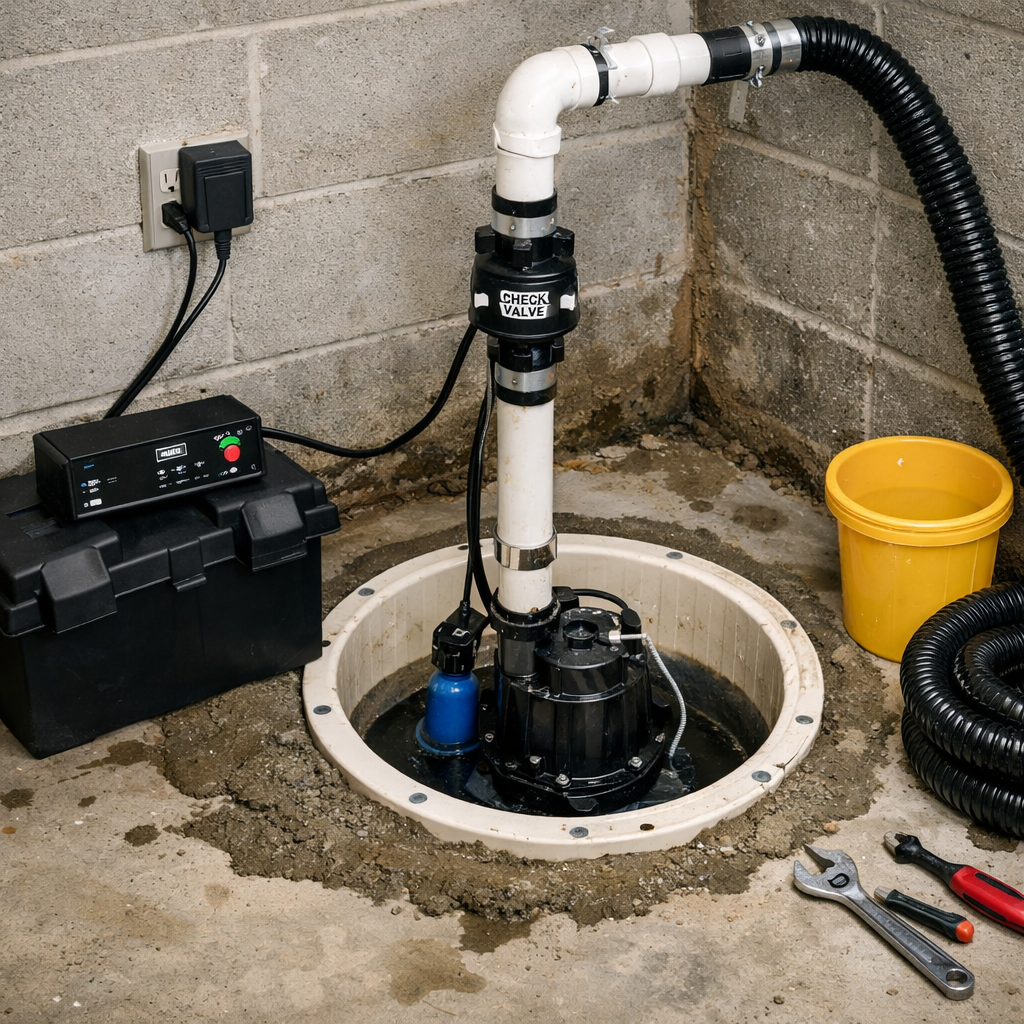
Installing the Sump Basin and Pump
Lower the basin into the pit on the gravel bed and check that the top rim is flush or slightly below the surrounding floor. Backfill around the basin with remaining gravel to secure it, then compact gently; avoid shifting the basin off level.
Install the pump on the basin floor or on a pedestal if specified; attach the check valve to the pump discharge port and tighten fittings with thread sealant or plumber’s tape. Route the float switch so it can move freely without obstruction from debris; test manual activation to confirm smooth travel and reliable ON/OFF action.
Setting Up Discharge Lines
Use rigid PVC for the discharge line from the pump to the outside; schedule 40 or 80 PVC minimizes sag and reduces clogs. Glue fittings with PVC primer and solvent cement; include a properly sized check valve within 12 inches of the pump to prevent backflow.
Slope the discharge pipe away from the foundation at a minimum 1/8–1/4 inch per foot. Install a frost-proof or turnout elbow where the line exits through the foundation, and terminate the outlet above grade with a screened or capped vent to prevent pests and ice blockage. Secure the line with hangers every 4 feet where it runs horizontally.
Ensuring Optimal Performance and Maintenance
You should verify the pump activates, move to reliable backup power, and perform scheduled cleaning and inspections. Focus on function checks, a tested backup plan, and simple routine tasks to prevent failures and costly water damage.
Testing the System
Test the pump monthly to confirm it activates and moves water smoothly. Pour about 5–10 gallons of water into the sump pit so the float rises to its cut-in point; the pump should start within seconds and stop at the cut-out level. Listen for unusual grinding or rattling sounds and watch for sputtering flow—both indicate debris, an impeller issue, or air in the discharge line.
Check the discharge path while the pump runs. Ensure the check valve prevents backflow and the discharge pipe carries water at full flow to the outside at least 10 feet from the foundation. Record run times and any irregular behavior so you can spot trends before they become failures.
Backup Power Solutions
Plan for power loss with at least one tested backup option. Install an automatic battery backup designed for sump pumps; choose a unit rated to run your pump for several hours at the expected run cycle. Verify battery health quarterly and replace batteries per manufacturer timeframes (typically 3–5 years).
Consider a secondary backup such as a generator or a water-powered backup if electricity outages are frequent. If you use a generator, connect the pump to a dedicated circuit or transfer switch and test under load. Label switches and educate household members on operation during storms.
Routine Maintenance Tips
Create a quarterly checklist to reduce unexpected failures. Clean the sump pit and remove grit, sludge, and debris that can jam the float or impeller. Inspect the pump housing, power cord, and float mechanism for cracks, fraying, or obstructions and replace worn parts promptly.
Lubricate bearings only if the manufacturer specifies it; many modern pumps are sealed and require no lubrication. Verify the check valve orientation and tightness, and clear any ice buildup or frozen discharge lines in cold months. Keep a spare pump, float switch, and basic tools on hand for same-day repairs.